Thursday, June 21, 2007

Father's day Card


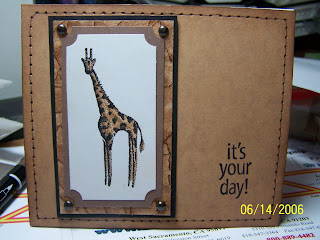
Another father's day card, I made 2 of this one, one for each of my fathers in law. I'm still playing with my new piercing bugs they're so much fun, I layered the giraffe on a piece of Faux Leather kind of hard to tell in the picture but it looks better IRL.. Thanks for visiting....

Friday, June 15, 2007

close up of frame


Here's a close up of the Frame. I used non Su paper on the frame and the chipboard heart, for some reason looks better IRL.... Tnx. Come again.....

baby shower basket prize


Here's the basket I raffled off in the diaper drawing everybody who brought diapers got their name in the drawing. In the basket I included some non SU 12x12 scrapbook paper, a stamp set, some water color pencils, a blender pen, a sponge, a letter opener, ribbon, paper clips and of course that frame. It was so much fun....

card #2


Here's the other one. It's cute too. I'm going to miss that set..... TFL

Chris's b-day cards


I made this card for my son's 17th b-day, very easy to make I had to make 2 that night one from Us and one from his grandma. Of course mine had to be cooler, sorry Deb. Anyway I used my piercing bug tool again I love that thing. For the carstock I used certain celery and a leathery looking non SU brown cardstock. I like it, I think it came out cute...

Rico graduated from preschool!!!!


Ok. This may not sound like a big deal to you, but I thought this was never going to happen and that I was going to have to home school him. He was getting in trouble almost daily and he didn't seem to like school, but in the end he liked going, he's looking foward to kindergarten, he can't wait to ride the big yellow bus with this brother.... My baby is growing up .....

Friday, June 8, 2007

baby scrapbook pages


Here's the pages I made for my friend's scrapbook baby shower. This is what We do usually, instead of doing make and takes We all do 2 12 x 12 scrapbook pages everybody bring supplies we can all use paper, stamps, adhesives zizzix machine etc. and she gets to keep them. I give her the scrapbook album as a gift along with my 2 pages so that way she has the scapbook and pages already made all she has to do is fill it up with pictures. This time We made it alittle different since We needed it to do something for father's day We brought the pages already made so We could have time to make our father's day projects. We had a lot of fun, We always do but it's always more fun when there's a party afterwards. Anyway, for my pages I used a non SU patterned paper brushed the chipboards letters with glue, I used tacky glue place the paper on the letter print side up, when over with the brayer to make sure there was no bubbles, let it dry then cut it out with the exacto knife the sponged the edges. On the journaling part I put a piece of vellum on top of the pale plum piece do she can actually write on it cause the little feet are stamped on the bottom piece.

Thursday, June 7, 2007

Father's Day Wallet


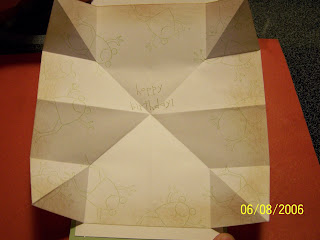
Here's project #2. We only made 2 projecs that day because We threw a scrapbook baby shower to our friend April, but that's another story. For this wallet you need to remember 2 important things use red sticky tape and don't tape all the way arround you got to leave an opening for the money and gift cards. I also used this new tool I don't know what it's called but it's from cutter bee and it's a faux stitch wheel so you don't have to punch each individual whole. It's pretty neat.

Faux Leather Father's Day Card


Don't pay attention to the date, I still haven't fix my camera, anyway... We made this card at our June meeting it was a Father's Day theme, for the Faux Leather you just need to cover the entire piece of paper with masking tape then I went over with the brayer to make sure the tape was stuck there really good, then I went over with the creamy caramel and then close to cocoa until I got the desired color then cover with clear embossing powder and heat set. I stamped the elephant with black stazon (very important) colored it with creamy caramel and blended it. This technique is soo cool I tried it on a wood picture frame and it looks cool too, I'll post that one later I need to put the finishing touches on it but in my case that can take weeks. Oh well I guess you just have to keep checking...